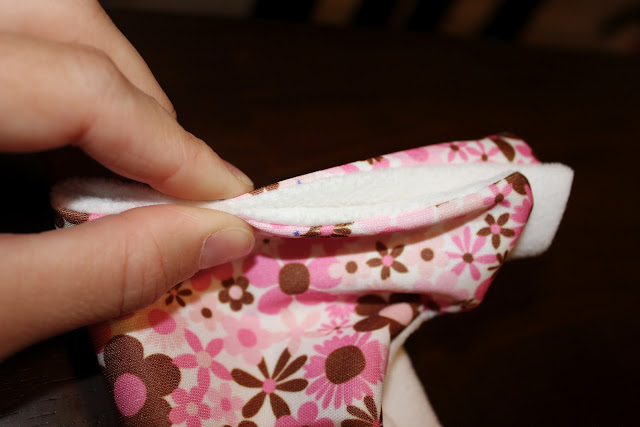
Cloth diapering mamas- have you ever thought about making your own pocket diapers/ covers? If you kinda know how to sew, it's not that hard- really! I'll show you!
A few notes- I am not a pro seamstress by any means. I basically taught myself with phone consults from my mom. I don't know all the technical terms for stuff, and I might not do everything the "right" way. But, I've made several of these, and they've turned out great! Feel free to comment or email me if you have questions, and I'll try to help! I have made this cover pattern out of wool- I might blog about that next time.
The PUL fabric can be pre-washed, but it doesn't need to be. I recommend washing the microfleece how you'll wash this diaper- it shouldn't shrink, but just to make sure...
 |
| Finished diaper. Can be a cover or pocket diaper. |
What you'll need:
-PUL waterproof fabric, at LEAST:
16" x 16" for Small
18" x 18" for Medium
20" x 20" for Large
(Can be pieced from almost-big-enough scraps)
-Microfleece fabric (like regular fleece but much thinner) or another non-wicking fabric (minky, suede cloth, etc, not flannel or cotton)
Same sizes
-Elastic- a 1/2 yard should be plenty:
1/4" for Small
3/8" for Medium and Large
(I use 3/8" for legs and back, and 1/4" for front- just my preference)
-Polyester thread
-Snaps, snap pliers or setter, awl (if you don't have these and live nearby, you may borrow mine, OR buy them here:
Kam Snaps )
-Pattern from here:
Cloth Revolution Pattern
I used her pattern and sort of her instructions, but found them super confusing. This is a simplified version.
Ready??
1. Lay out your PUL. Figure out which direction stretches more. You want the stretchiest direction across the bum, not down the length. Fold fabric accordingly, and pin pattern to fabric.
 |
| PUL laid out with pattern pinned. |
2. Cut it out. (My piece wasn't quite big enough, and I pieced together on of the "wings." If you need to piece together the PUL, try to ensure that 1- the stretch is the same direction, and 2- piece the wings, not the body of the cover- to prevent huge leaks. Use fabric glue to stick the pieces together, then sew over the seam.)
3. Lay out the microfleece (take note of the stretch direction- stretchiest across bum, not length), fold, pin pattern, cut out.
 |
| Pretty diaper! |
4. Pin up pocket elastic channels in the back of the diaper.
 |
| Pin |
 |
| Sew. Make sure the channel is wide enough for your elastic (1/4" or 3/8") |
 |
| Do this for both PUL and microfleece. |
5. Lay your fabrics together right side together (you can pin if you really want to, but it's not really helpful). The seams of the pocket elastic channels will be showing. Then, sew them together with approximately a 1/4" seam.
***Leave ONE of the shorter "wings" unsewn.
***Do NOT sew the pocket elastic channels together!
***It's easier to sew with the PUL down (at least on my machine). The microfleece doesn't go through the feeders very well, and sometimes gets jammed.
 |
| Pretty sides together. |
 |
| One front "wing" open. |
 |
| If the microfleece stretches a bit, it's ok!! |
6. So, now you should have an almost all sewn together diaper. Open only on one front wing and the pocket opening in the back. Trim where microfleece stretched past the PUL, angle corners, and cut little slices in curves (see pics).
 |
| Angle corners |
 |
| Trim edges so they're about even all the way around. (Mmm coffee.) |
 |
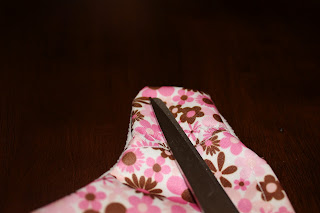
| Little slices in curves- be super careful you don't cut the seam (if you do, resew over that seam so the pieces don't come apart). This will make flipping the diaper right side out much smoother. |
7. Flip the diaper right side out.
 |
| Use closed scissors or a capped pen to poke out the corners of the wings so they're sharper. |
 |
| Poke, poke. |
8. Lay diaper on top of paper pattern. Note on the pattern where elastic tacking points are.
 |
| Mark with sharpie or pin (I prefer sharpie so you don't get stuck). Mark one side, then fold diaper, and mark opposite side to make sure they're even. |
|
 |
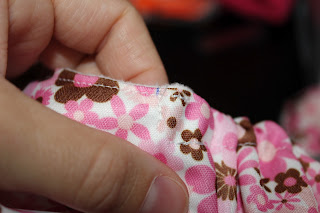
| See the tiny blue marks? You won't see them when you're all done. |
9. Now, we're going to top stitch around the outside of the diaper. This will ensure edges lay evenly and make it look nicer all around. BUT, we're not going to top-stitch where the elastic goes.
--Where you have the elastic places marked, sew a channel for the elastic to live, but don't sew the ends of the channels- leave them open for now- like little tunnels.
--Sew the channels about 1/8" wider than the elastic you're using. You can sew this in an almost continuous line (see pic below).
--Where you top-stitch, sew as close to the edge as you can, making sure to sew both pieces together.
--Make sure you reverse over your stitches at the beginning and end of each segment so the seam doesn't unravel.
 |
| Here's what you're going to sew: BLUE is top-stitched, GREEN is elastic channels. Leave that open wing side untouched, and don't sew the pocket opening. |
 |
| Once you've sewn a line- reverse, forward, then pick up the machine foot and move it to the next place to sew- go forward, reverse, then keep going forward! |
 |
| See the little bridge of thread between the lines of stitches? We'll cut that later. |
10. GOOD JOB!! We're almost done with the sewing part!! Cut all the little "bridges" on both sides, all long thread ends, just generally trim it up nice and neat.
11. Elastic time. Cut your pieces to the size you want (for my diaper- a Medium- I do one 1/4" elastic piece about 3 inches long, then 4 pieces of 3/8" elastic about 5 1/4 inches long- that might be a tad tight on my chunky- thighed baby). I would estimate a Small would use about 2 inches in the front and 4 inches on the legs and back, and a Large would need 3 1/2 inches in front and 6 1/2 inches for the legs and back? That's an estimate. You can measure the elastic in your current diapers to get a better idea. If it's too loose, you can tighten it up, if it's too tight, as long as it's not cutting off circulation, it's better leak protection, right?? :-)
 |
| My pieces. |
If you know how to put elastic in, you can skim or skip this section and just do it. If not, I'll try my hardest to explain it in words and pics.
 |
| I don't know what this thingy is called, but it's great for pulling elastic through the channel. You can use a safety pin if you don't have this tool. I'll call them grabbers. :-) |
|
Let's do the front first. Pull elastic into channel on the side with the sewn wing, SLOWLY. Stop when the end gets close to your marked spot. Sew it in place- forward, reverse, forward, reverse. Make sure the elastic is sewn in and won't snap out when you pull it- the end should be about 1/8" past where it's sewn. Then, pull the grabbers out the open wing until the elastic is way past the other marked spot. Take the grabbers off, and VERY CAREFULLY align the end of the elastic piece with the marked spot so it's past the mark by 1/8"-1/4". Then, sew it down, being super careful to actually sew the elastic in, otherwise, the elastic will snap back into the channel and will be hard to retrieve to re-sew.
These pics are from one leg channel.
 |
| Sewn in place at the beginning. |
 |
| The grabbers are only this far in when I sewed the elastic in place. |
Once sewn, pull the grabbers through the other end about 1-2 inches past the opening.
 |
| Hold the elastic tightly, and remove the grabbers or safety pin. |
 |
| Carefully align the end of the piece and sew the elastic in, leaving about 1/8-1/4" of elastic past the stitches. It's OK if it's on top of the marked spot. I happened to get really close on this one, but usually it's much further off. |
Repeat until all the elastic is in place!
Then, flip the diaper partially inside out, so you can finish the one un-sewn wing. Sew it inside out, then trim edges, flip back, poke out corners, and top-stitch (just like you did with the rest of the wings).
 |
| Yay! Elastic is in and we're all sewn up!! |
Way to go! You did it! ALMOST done!!
12. Snaps. Let's do the front wings first. You can use either studs or sockets, it doesn't matter. I did sockets on the front wings, and studs on the back wings.
 |
| Poke a hole with the awl about right here on the front wing (you can measure if you're a perfectionist, but it's really not necessary). |
 |
| The cap of the snap goes on the pretty side of the diaper on the front wings. |
 |
| Socket goes on the inside. |
 |
| Apply pliers or setter and SQUISH! |
 |
| Ta-da! |
 |
| Repeat about 3/4" down (for Medium, 1" for Large, Small only has one per side). It's fine if they're diagonal (not perpendicular) to the top line of the diaper- the wing ends aren't straight. | |
|
|
 |
| Repeat on the other side. Front wings done! |
|
|
 |
| Repeat for the back wings, except caps go INSIDE. |
 |
| Studs go on the pretty side. |
 |
| If your front wing snaps are at a diagonal, the back wing snaps need to be at approximately the same diagonal. Measure 3/4" (or 1" for Large) down and diagonal and place the next one. |
 |
| Measure out 3/4"-1" in for the next set of two, then again for the final set. If you have a skinny kid, you can do a fourth set to make sure the diaper is snug. (This is the back wing I pieced- can you even tell?? Nope!) |
 |
| Check to make sure they all "snap" when you close them. |
 |
| Repeat on the other side! Yay! Pretty diaper!! |
13. ONE MORE STEP. This part is the easiest, but maybe the most important. Put the diaper in the dryer on high for 20-30 minutes. The heat will seal the holes you made from pinning, sewing and putting the snaps on. I usually do 30 just to make sure it's well sealed.
NOW, you're all done!
 |
| J with her fancy pants on. |
 |
| So big sitting by herself. |
I use a tri-folded pre-fold to either stuff in the pocket or use this as a cover. They work great, and I like that the snaps are on the side, not rubbing or poking her tummy.
These take me about 45-60 uninterrupted minutes from start to finish, but your first few will take a bit longer til you get the hang of it.
I'd be happy to chat about custom making some for your kid. Email me!
consideringsparrows917@gmail.com
-Celina


No comments:
Post a Comment