Monday, April 30, 2012

Almond Joy Scones

I haven't baked in ... well, a while. And I was craving yummy, carby, sweet, baked goodies. So, I went back to my (most recent) baked obsession- scones! Coconut, almond, chocolate, baked goodness. Sounds like happiness, well, taste bud happiness anyway. So, here's the recipe so I can share my happiness with the world. 


Almond Joy Scones

1/2 cup oats
1 1/2 cup all-purpose flour
1/3 cup white sugar
1 1/4 tsp baking powder
1/4 tsp baking soda
1/2 tsp salt
1/2 cup shredded coconut, toasted
1/2 cup sliced almonds, toasted
8 tbsp butter, frozen, stick cut in half
1/2 cup plain greek yogurt
1 egg
1/2 tsp almond extract
1/2 cup semi-sweet chocolate chips

1. Preheat oven to 400*, line baking sheet with parchment paper.
2. Chop the oats in the food processor until it's a fine meal consistency.
3. Toast the almonds and coconut. Chop in the food processor- leave it fairly coarse.
4. Mix oats, flour, sugar, baking powder, baking soda, salt, almonds and coconut in large bowl.
5. Blend yogurt, egg and extract in small bowl until it's a smooth goo. 
6. Use food processor with slice blade to slice frozen butter. Add butter to dry ingredients- mix with spoon. 
7. Add goo to large bowl, mix and mix and mix.
8. Take off rings, flour clean counter top. 
9. Use clean hands to knead/ mix/ blend dough until it's a big ball of heavenly goodness. 
10. Put dough ball on floured surface and pat out to a circle about 3/4 inch thick. 
11. Use pizza cutter to slice like a pie. Place on lined baking sheet. Bake for 13-15 minutes, until tops are golden. Cool on counter or wire rack.
12. When cool, melt chocolate chips in microwavable bowl. Drizzle or use a spoon or small spatula to spread over scones. 
13. EAT. :-)

I added these- found them in the baking aisle of Target, near the marshmallow fluff.
I added about 1/3 cup- should have added more.
If you have this, or can find it in your grocery store, you can sub 1/2 the yogurt for this fantastic creamer (or be brave and try something like coconut milk instead!). It might make the dough a big sticky- if it does, when you're hand mixing, add 1 tablespoon of flour at a time and mix in really well until it's more doughy and less sticky. Mine required an additional 2 tbsp of flour.


Yummy! Enjoy!!

-Celina


Monday, April 23, 2012

Wool diaper cover

Hi all! I told you how I've made the side-snap pocket diaper out of wool, so I thought I'd write a post on HOW to do it. I love using wool diaper covers, especially when they've been upcycled from an old sweater. They're breathable (nice for summer!), water resistant, and absorbent, so less likely to leak. Plus, they're a lot more forgiving when you're making them. You can piece it together and be imperfect and it'll work exactly as if it were perfect! If you haven't read my previous post on how to make the side-snap cover, it'll be good to refer to. There are several points that are the same, so I won't go into as much detail on this tutorial as I did with that one (like putting elastic in, putting snaps on, etc.).

Cute little woolie!

What you'll need:

-100% wool sweater from the thrift store, felted (I'll show you how in a minute)
-Elastic- a 1/2 yard should be plenty:
     1/4" for Small
     3/8" for Medium and Large
-Thread
-Snaps, snap pliers or setter, awl (if you don't have these and live nearby, you may borrow mine, OR buy them here: Kam Snaps )
-Pattern from here: Cloth Revolution Pattern
-Lanolin (the Lansinoh brand for breastfeeding works well, but any brand will do)

Selecting your wool and felting it

1. Select a 100% wool sweater of medium thickness. Too thin, and it won't a) felt well, b) hold it's shape when sewn, and c) be as water-resistant as you'd like for a cover. Lots of thrift stores will have then on sale right now. I just got 6 sweaters for about $10- nice!

100% wool. I try to get the largest size I can find to have the most material :-)


2. Throw your wool sweater in the washer on HOT for the longest cycle you have.If you have more than one sweater, you can do them all together. Check them when done, if they don't look like they've shrunk very much, run it again. I don't use soap, but you can use a tiny bit of wool wash or cloth diaper-friendly detergent if you really want to.

3. Throw them all in the dryer on HOT until dry.

This is pre-felting. Look at the weave.
This is post-felting. You can barely see the weave anymore- that's good! It's make it more water-resistant, because it's harder for liquids to get through.
You can see how much they shrink- this is that same mens XL Gap sweater. It's a tad small now...
That's it! You're ready!

Making the Cover

This is going to be single- layered, not a pocket style the the other one. Remember that the pattern has a built-in seam allowance? We'll fix that so the diaper won't be too large. The way we fix it, the sizing will still be close to the same- wool stretches a bit more when using it than PUL, so this might fit be a tiny bit bigger.

1. Find the biggest piece of material on the sweater- probably the back. Lay out the pattern. Pin. Cut out.


My back wings went out into the arms of the sweater, over seams- that's fine! If you have to piece chunks together, that's fine, too.
On the back, cut it straight, don't cut out the pocket elastic tab (like I did). Also, if you use the hem of the sweater, it's ok if it's smaller. Look at the bottom of the pic above- the sweater doesn't line up with the pattern- completely fine.
2. Find two pieces of wool so we can double layer the front and back wing pieces.
Cut strips like this for both front and back.
My back extra strip is pieced in the middle- see the seam?
3. Now, we're going to cut out the seam allowances, while making tabs to create channels for the elastic.
Find where the pattern shows the elastic tacking point is, and cut 1/4 inch slits a little bit higher than the mark (so the elastic channel will be a bit longer than the pattern says).
Then cut out the excess part between the channel and the wing tabs- don't cut the front or back or the wings down- just these little pieces.
Do front and back parts between the elastic channel and the wing end. 
So, when you're done, the diaper looks like this (minus the tab in the back- on the left of the pic- I cut that off later)
 4. Decide which side of the wool is the inside (doesn't really matter- but if you've pieced or have gone over a seam, that should be inside) .Pin the elastic channel tabs you just cut over on the inside of the diaper. Pin the extra wing strips in place (sounds like a sports bar- "I'll have extra wing strips with fries. Thanks.").
Pinned.
5. Now we're going to sew all the way around. Since the wool is felted well, it shouldn't unravel too much, but just in case we're going to use a narrow, short zig-zag stitch around all the edges, sew the wing strips in place, create front and back elastic channels and create the channels for the leg elastic. It's not as complicated as it sounds :-). I used a hot pink thread bobbin because a) I was too lazy to make a brown bobbin, b) it's cute with the brown sweater, and c) so you can see it better!

See where I sewed? All the way around the wings, front and back, and then I sewed the leg elastic channel tabs down, then I sewed little channels for the front and back elastic. Go back and make sure you caught the extra wing pieces with sewing- I had to resew the front (on the left) to make sure they were sewn together well. Your extra wing pieces should still be open toward the middle of the diaper (I don't have a pic). We'll sew that last side down later, but we need it open for now to put the elastic in. If the wool curls a bit, that's ok, it'll relax after you've lanolized and used it a few times.
6. Elastic time. You'll only need one piece for the back this time- for a total of 4 pieces. The sizes should be the same as the last diaper-
-Small would use about 2 inches in the front and 4 inches on the legs and back
-Medium- about 3 inches long for the front, then about 5 1/4 inches long for back and legs
-Large would need 3 1/2 inches in front and 6 1/2 inches for the legs and back
That's an estimate. You can measure the elastic in your current diapers to get a better idea.
Do the front first, then the legs, then the back (it's easiest, but probably doesn't really matter). See previous tutorial for more instructions on putting in elastic.
All in and sewn down well!

 7. Snaps. Again, same as before. This time, you can make the caps hidden inside the back wings (under the extra wing pieces) so they're not against baby's skin. Six on each back wing, 2 on the front (unless you're doing a small). I did mine pink, 'cuz it's cute!
I did mine about an inch apart.
8. Now, sew down those last wing pieces with the same narrow, short zig-zag stitch.
All done! Well, almost.

Lanolizing 

I didn't make that term up, promise. This is a better tutorial on how to do it, so if my instructions are confusing, try her method. Her tutorial uses baby wash, I don't. Just my preference.

You'll need:
Lanolin
Tiny jar with lid (like an old spice jar- preferably glass)
Sink

1. Put your beautiful cover in the sink. Run warm water over it.
Let it soak up the water- swish it around, squeeze it a bit if needed. 

2. Fill your jar with water. Add a pea-sized blob of lanolin.

3. Microwave this uncovered for 30 seconds or until it's super hot.
4. Put the lid on it, and shake. If it's too hot to handle, hold with a towel or pot holder.
It should be a nice milky color.
5. Slowly and evenly pour about half of the lanolin water over the whole diaper in the sink while swishing diaper around in the water. Then, flip the diaper over, and pour the rest on the other side.
Instead of holding the camera with the other hand (like me), you should be swishing the diaper around.
Like this.
6. When all the lanolin is poured, rinse out the jar a few times with the sink water and pour over diaper. Swish around well.
7. Let it sit for about 5 minutes (or more if you forget- like I did).
8. Drain the water out of the sink and press the diaper against the side of the sink to get most of the water out.
It's amazing how much water wool absorbs!!
9. Lay out on a clean kitchen towel, roll up, and squeeze to get even more water out.

10. Let air dry! I put mine on my rack in the dryer and dry on extra low heat for forever- like an hour or more until it's dry. I'm too impatient to let it completely air dry.
Drying...


TA-DA! So cute!!
I use these the same way as the PUL covers- lay a tri-folded pre-fold inside. You can also use over a fitted diaper. I was nervous about wool the first few times I used it, but now, I love it! If you have problems with the wool absorbing too much and seeping through, you may need to lanolize again. If you put the cover under the water and the water runs off, you're good, but if it absorbs without too much squeezing and squishing, then re-lanolize. Keep in mind that this is not plastic, so if the diaper is too wet for too long, liquid eventually will seep through. But, I use mine at night with a premium pre-fold, and haven't had a leak yet- even with a heavy wetter!

To maintain wool: don't wash the cover unless it's soiled. Just let it air dry and reuse. Wool is naturally anti-microbial, so it'll prevent bacteria from growing. If you do need to wash, use a gentle baby wash in the sink, and re-lanolize.

Please email me if I've created questions! I'm happy to (try to) answer them! consideringsparrows917@gmail.com

-Celina

Saturday, April 14, 2012

Roasted Red Pepper Hummus

In an effort to steer away from the massive amounts of baked goods we've been consuming lately, I've decided to make hummus. My hubby eats more veggies than any human should, and loves a yummy hummus to dip all those carrots and celery sticks in. I never wanted to make hummus before- I thought it would be way too hard and complicated. I just finished making this hummus and even I (usually a not a huge veggie and hummus lover) think it's super good, and really not hard! All the measurements are approximate, since I rarely actually dirty a measuring cup or spoon on something unbaked. :-) I cooked my chick peas in the crock pot- the whole bag plus enough water to cover + some and cook on low for about 4 hours (you can always drain excess water out when done cooking). The rest of the whole chick peas (cooked) will freeze beautifully to make the next batch of hummus!

Roasted Red Pepper Hummus

2 cups cooked chick peas
1 tbsp sesame seeds (very lightly toasted- don't over-toast them, it makes them kind of bitter tasting)
6 oz marinated roasted red peppers (I used Mt. Olives brand, 2 pepper halves- about 1/2 the jar)
2 tbsp marinating olive oil (from the jar of peppers)
1 tsp salt
1/2 tbsp garlic powder
1/2 tbsp dried basil
1/2 tbsp lemon juice

1. Put chick peas, toasted sesame seeds, peppers and oil in food processor with chopper blade. Blend well, until basically smooth. If it's too dry looking, add more oil.
2. Add everything else. Blend well- about 2 minutes on high to make sure it's all incorporated and smooth.
3. Taste-test! Does it need anything? Add it!


Delicious! And I thought it would be hard to make! HAHA! :-)

I've also made this with lime juice, cilantro and garlic. I'm currently eating my hummus on a whole wheat tortilla with black pepper turkey and spinach. So good! 

On another, sadder, note: my daughter J seriously gagged on the baby yogurt I gave her this morning. If she doesn't like yogurt, I'm gonna be very disappointed. :-( Maybe I should make baby hummus for her... hmmm...

-Celina

Thursday, April 5, 2012

Side-Snap Pocket Diaper

Cloth diapering mamas- have you ever thought about making your own pocket diapers/ covers? If you kinda know how to sew, it's not that hard- really! I'll show you!

A few notes- I am not a pro seamstress by any means. I basically taught myself with phone consults from my mom. I don't know all the technical terms for stuff, and I might not do everything the "right" way. But, I've made several of these, and they've turned out great! Feel free to comment or email me if you have questions, and I'll try to help! I have made this cover pattern out of wool- I might blog about that next time.

The PUL fabric can be pre-washed, but it doesn't need to be. I recommend washing the microfleece how you'll wash this diaper- it shouldn't shrink, but just to make sure...

Finished diaper. Can be a cover or pocket diaper.

What you'll need:

-PUL waterproof fabric, at LEAST:
     16" x 16" for Small
     18" x 18" for Medium
     20" x 20" for Large
     (Can be pieced from almost-big-enough scraps)
-Microfleece fabric (like regular fleece but much thinner) or another non-wicking fabric (minky, suede cloth, etc, not flannel or cotton)
     Same sizes
-Elastic- a 1/2 yard should be plenty:
     1/4" for Small
     3/8" for Medium and Large
     (I use 3/8" for legs and back, and 1/4" for front- just my preference)
-Polyester thread
-Snaps, snap pliers or setter, awl (if you don't have these and live nearby, you may borrow mine, OR buy them here: Kam Snaps )
-Pattern from here: Cloth Revolution Pattern
     I used her pattern and sort of her instructions, but found them super confusing. This is a simplified version.

Ready??

1. Lay out your PUL. Figure out which direction stretches more. You want the stretchiest direction across the bum, not down the length. Fold fabric accordingly, and pin pattern to fabric.
PUL laid out with pattern pinned.
2. Cut it out. (My piece wasn't quite big enough, and I pieced together on of the "wings." If you need to piece together the PUL, try to ensure that 1- the stretch is the same direction, and 2- piece the wings, not the body of the cover- to prevent huge leaks. Use fabric glue to stick the pieces together, then sew over the seam.)

3. Lay out the microfleece (take note of the stretch direction- stretchiest across bum, not length), fold, pin pattern, cut out. 

Pretty diaper!
4. Pin up pocket elastic channels in the back of the diaper.
Pin
Sew. Make sure the channel is wide enough for your elastic (1/4" or 3/8")
Do this for both PUL and microfleece.
5. Lay your fabrics together right side together (you can pin if you really want to, but it's not really helpful). The seams of the pocket elastic channels will be showing. Then, sew them together with approximately a 1/4" seam.
***Leave ONE of the shorter "wings" unsewn.
***Do NOT sew the pocket elastic channels together!
***It's easier to sew with the PUL down (at least on my machine). The microfleece doesn't go through the feeders very well, and sometimes gets jammed.
Pretty sides together.
One front "wing" open.
If the microfleece stretches a bit, it's ok!!
6. So, now you should have an almost all sewn together diaper. Open only on one front wing and the pocket opening in the back. Trim where microfleece stretched past the PUL, angle corners, and cut little slices in curves (see pics).
Angle corners
Trim edges so they're about even all the way around. (Mmm coffee.)
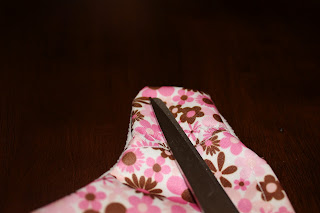
Little slices in curves- be super careful you don't cut the seam (if you do, resew over that seam so the pieces don't come apart). This will make flipping the diaper right side out much smoother.

7. Flip the diaper right side out.
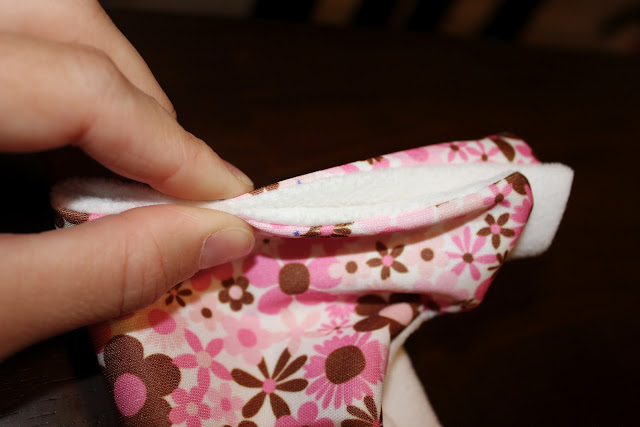
Use closed scissors or a capped pen to poke out the corners of the wings so they're sharper.
Poke, poke.
8. Lay diaper on top of paper pattern. Note on the pattern where elastic tacking points are.

Mark with sharpie or pin (I prefer sharpie so you don't get stuck). Mark one side, then fold diaper, and mark opposite side to make sure they're even.
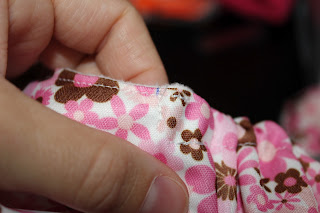
See the tiny blue marks? You won't see them when you're all done.
 9. Now, we're going to top stitch around the outside of the diaper. This will ensure edges lay evenly and make it look nicer all around. BUT, we're not going to top-stitch where the elastic goes.
--Where you have the elastic places marked, sew a channel for the elastic to live, but don't sew the ends of the channels- leave them open for now- like little tunnels.
--Sew the channels about 1/8" wider than the elastic you're using. You can sew this in an almost continuous line (see pic below).
--Where you top-stitch, sew as close to the edge as you can, making sure to sew both pieces together.
--Make sure you reverse over your stitches at the beginning and end of each segment so the seam doesn't unravel.
Here's what you're going to sew: BLUE is top-stitched, GREEN is elastic channels. Leave that open wing side untouched, and don't sew the pocket opening.
Once you've sewn a line- reverse, forward, then pick up the machine foot and move it to the next place to sew- go forward, reverse, then keep going forward!

See the little bridge of thread between the lines of stitches? We'll cut that later.
10. GOOD JOB!! We're almost done with the sewing part!! Cut all the little "bridges" on both sides, all long thread ends, just generally trim it up nice and neat.

11. Elastic time. Cut your pieces to the size you want (for my diaper- a Medium- I do one 1/4" elastic piece about 3 inches long, then 4 pieces of 3/8" elastic about 5 1/4 inches long- that might be a tad tight on my chunky- thighed baby). I would estimate a Small would use about 2 inches in the front and 4 inches on the legs and back, and a Large would need 3 1/2 inches in front and 6 1/2 inches for the legs and back? That's an estimate. You can measure the elastic in your current diapers to get a better idea. If it's too loose, you can tighten it up, if it's too tight, as long as it's not cutting off circulation, it's better leak protection, right?? :-)

My pieces.
If you know how to put elastic in, you can skim or skip this section and just do it. If not, I'll try my hardest to explain it in words and pics.
I don't know what this thingy is called, but it's great for pulling elastic through the channel. You can use a safety pin if you don't have this tool. I'll call them grabbers. :-)
Let's do the front first. Pull elastic into channel on the side with the sewn wing, SLOWLY. Stop when the end gets close to your marked spot. Sew it in place- forward, reverse, forward, reverse. Make sure the elastic is sewn in and won't snap out when you pull it- the end should be about 1/8" past where it's sewn. Then, pull the grabbers out the open wing until the elastic is way past the other marked spot. Take the grabbers off, and VERY CAREFULLY align the end of the elastic piece with the marked spot so it's past the mark by 1/8"-1/4". Then, sew it down, being super careful to actually sew the elastic in, otherwise, the elastic will snap back into the channel and will be hard to retrieve to re-sew.

These pics are from one leg channel.
Sewn in place at the beginning.
The grabbers are only this far in when I sewed the elastic in place.
 Once sewn, pull the grabbers through the other end about 1-2 inches past the opening.

Hold the elastic tightly, and remove the grabbers or safety pin.
Carefully align the end of the piece and sew the elastic in, leaving about 1/8-1/4" of elastic past the stitches. It's OK if it's on top of the marked spot. I happened to get really close on this one, but usually it's much further off.
 Repeat until all the elastic is in place!
 Then, flip the diaper partially inside out, so you can finish the one un-sewn wing. Sew it inside out, then trim edges, flip back, poke out corners, and top-stitch (just like you did with the rest of the wings).
Yay! Elastic is in and we're all sewn up!!
Way to go! You did it! ALMOST done!!

12. Snaps. Let's do the front wings first. You can use either studs or sockets, it doesn't matter. I did sockets on the front wings, and studs on the back wings.
Poke a hole with the awl about right here on the front wing (you can measure if you're a perfectionist, but it's really not necessary).

The cap of the snap goes on the pretty side of the diaper on the front wings.

Socket goes on the inside.
Apply pliers or setter and SQUISH!
Ta-da!
Repeat about 3/4" down (for Medium, 1" for Large, Small only has one per side). It's fine if they're diagonal (not perpendicular) to the top line of the diaper- the wing ends aren't straight.

Repeat on the other side. Front wings done!

Repeat for the back wings, except caps go INSIDE.
Studs go on the pretty side.
If your front wing snaps are at a diagonal, the back wing snaps need to be at approximately the same diagonal. Measure 3/4" (or 1" for Large) down and diagonal and place the next one.
Measure out 3/4"-1" in for the next set of two, then again for the final set. If you have a skinny kid, you can do a fourth set to make sure the diaper is snug. (This is the back wing I pieced- can you even tell?? Nope!)
Check to make sure they all "snap" when you close them.
Repeat on the other side! Yay! Pretty diaper!!
 13. ONE MORE STEP. This part is the easiest, but maybe the most important. Put the diaper in the dryer on high for 20-30 minutes. The heat will seal the holes you made from pinning, sewing and putting the snaps on. I usually do 30 just to make sure it's well sealed.


NOW, you're all done!
J with her fancy pants on.
So big sitting by herself.
I use a tri-folded pre-fold to either stuff in the pocket or use this as a cover. They work great, and I like that the snaps are on the side, not rubbing or poking her tummy.

These take me about 45-60 uninterrupted minutes from start to finish, but your first few will take a bit longer til you get the hang of it.

I'd be happy to chat about custom making some for your kid. Email me!
consideringsparrows917@gmail.com

-Celina